Tuesday, 19 August 2014

Thank you Pinterest and Kristen Moore

Hello again!  Running short of time (as usual) and needing to make an anniversary card, I turned to Pinterest and was surprised to see so many lovely cards there for inspiration.  One in particular struck me and I visited Kristen's site for a closer look here

This was her lovely card designed in 2009 and I realised I had both the birdie punch and a heart die - woo hoo!


It took no time at all to make my card and no stamping or ink drying time needed!  Here's mine:


Thank you so much Pinterest and especially Kristen - you saved my day and I'm your new follower!  Margie x


Thursday, 14 August 2014

Sew pretty - a little album for a friend

Hello friends.  I've just finished off a little album for a friend's 70th birthday this weekend.  She's a quilter so I thought a sewing theme would be appropriate.  Now I wish I could remember where I saw this idea for the binding but it was on the internet recently and I've lost the place!  Anyway, you will see from the cover here that I just wrapped twine round and round and then tied it together at the top and threaded the ends through a flower and a button to secure.


The pages are then just folded and slipped through the twine loops and it looks like this on the inside.


Very simple but effective.  I've just got a couple of the inside pages to show you as there's obviously a lot but there is plenty of space for pics and lots of little tags in pockets for her to write notes.


And of course, it needed a box and I had the perfect flower to top it! I knew it would find a home soon.


Hope you're having better weather than we are at the minute - lots of really heavy rain and a definite cooling in the air.  Feels very autumnal.  Thanks for popping in.  Margie x

Wednesday, 6 August 2014

Magazine page flowers anyone?

Hello again - I've been playing today making some flowers from cut up magazine pages.  I love the vibrant effects you can achieve just by selecting some lovely coloured pages (my John Lewis magazine was just perfect).  I then cut some squares, folded these in quarters and cut some four-petalled shapes.  The longer pointy petals were done by folding the squares one more time and cutting a long pointy shape! The trick is to remember where the centre of your shape is going to be and making sure you don't cut through that otherwise you'll be left with a pile of separate petals - not what you wanted!

Anyway - here's the picture of my finished flowers

I've used about 5 or 6 different layers for each flower and I love them both although the blue one has turned out really elegantly with that gorgeous button in the middle.  Once my layers were selected, I doodled each petal with black and white pens, curled the edges with a pair of scissors then formed the flower shapes by snipping down into the centre between two petals and sticking those two petals together - I'm sure you've all seen the Tim Holtz method of making flowers....... 

Once the layers were all stuck together, I cut a circle of paper and fringed the edge to make the centre and stuck a button with the shank removed in the middle - job done!

I think these will look great on gift boxes and I might even give them a coat of Mod Podge to make them extra sturdy but they aren't flimsy by any means.  Check out your old magazines for lovely coloured pages and rip away - you'll be hooked.  Thanks for taking the time to pop in.  Margie x

Monday, 4 August 2014

Meet Marianna ......

Hello friends.  You may have seen a few videos on YouTube involving wrapping a doll in plastic wrap and creating a papier mache bodice for an art dress?  Well, I looked at them and thought, hmmm, wonder if I could make a dress using the Tim Holtz dressform die for the base.

So let me introduce my very first art dress, she's very classy and I've called her Marianna,

I cut two of the dressforms from some mountboard then cut one of them in half lengthwise and attached these halves at right angles to the second dressform (does that make sense) so it was a 3D dressform which stood up nicely. I painted this white then I cut the bodice of the die several times from some nice shiny paper and folded these in half.  After glittering the edges I fitted about 8 folded pieces to make a nice curved bodice and then curved the edges.  Once that was done I set about making the underskirt with tulle - I used white but I think pale pink would have stood out better.  I just gathered the tulle with a running stitch and glued it round the dressform leaving a gap at the front where the paper skirt will fit in.

A layer of gathered wide lace site on top of the tulle and then this was decorated with pearl trimmed narrow lace.  The lovely folded bit at the front was done with music paper trimmed with pink lace and then glued in tiers into the space left by the other layers.  Much easier to do than it sounds and there's a video here if you want to see it for yourselves.  https://www.youtube.com/watch?v=5NVwBXujDz0

After fixing some roses at the waist and a little heart locket, I wanted to do some more with the back.  Here it is.

I fan folded a piece of cream paper and covered the back of the bodice with it before sticking in some pearl hatpins - it reminds me of the high Elizabethan collars.  You can also see the stand on this picture which makes quite a sturdy base for the dress.  Well I hope you like this - I really enjoyed making it and can't wait to make another one.

Thanks so much for popping over - I really appreciate your visit and any comments you might kindly leave me, they mean a lot.  Margie x

Tuesday, 29 July 2014

Love is in the air ........

Can't believe its almost August but I hope you've all been enjoying some fantastic weather lately.  We've had family visiting so not much time for crafting but I did have a commission to make a pop-up wedding card in a box which I really enjoyed doing and I'm sure the happy couple won't mind me sharing with you.  Here's the card standing up - I love all the layers you can achieve.


and here's a couple of pics where the card is flattened for posting - very clever whoever thought of it!


And while I'm on a romantic theme - here's my latest spreads for the altered book round robin.  This book was entitled Once Upon A Time so I chose a fairy story as my theme.  Here's the first spread,

I asked my hubby which fairy story he thought it was and he said Snow White!  Where did I go wrong????
Anyway, here's the second spread - it did actually click with him this time, think it was the glass slipper.........
Hope you've had some crafting time this month although with the weather being as warm as it has in the North East of England, its been BBQs and beaches for us!  Hugs, Margie x

Tuesday, 1 July 2014

Home is where the heart(h) is ...

Hello again!  Back with my latest altered book in the 12-month worldwide round robin I joined in January.  Getting much more confident about working in other people's books now and this one, entitled "Home" was right up my street LOL.  My first spread was inspired by a very lovely old reference book I picked up at a collectables fair for just £1.  Its called Home Lover's Encyclopedia published in 1933 and has some wonderful illustrations, one of which I used for the background.

The words are cut from magazine pages and the stamps are from a lovely new Eclectica 3 set from Sara Naumann for PaperArtsy (ESN01) which I'm finding very useful for my book art.

My second spread in the book was a bit more complicated.  I wanted to do a little folded house made from Tim Holtz Artful Dwellings die which worked brilliantly until I tried to close the book.  Ooops - too thick, so I cut the house in half and divided it between the two pages and now it pulls out on both sides and I think it looks fine.  See what you think.


The words are meant to signify the lengthy process of turning our old cottage into a home and we are now 37 years into a 10 year project so things don't move very fast round here!  The brass pieces in the pics are from my hubby's collection in his den and I just grabbed what I could to support my book.

Really enjoyed working on this book and its now on its way to Australia for the next participant.  Its costing a lot to send each book (over £11) so I'm thinking of setting up a UK-only based altered book round robin next year so if anyone would like to play along, please let me know and hopefully we'll get enough people to make it work.  Thanks so much for stopping by and looking at my work.  Margie x

Saturday, 28 June 2014

Its been a while.....

Hello dear friends and I have to ask "What happened to the month of June?"  Here we are almost into July and its all passed in a blur - or is it just me......

Anyway, I've been very busy in the garden and crafting whenever possible, doing some workshops and learning some new things myself including silk art and glass fusing.  My next experience will be into machine embroidery so for someone who is afraid of their sewing machine, that's going to be fun.

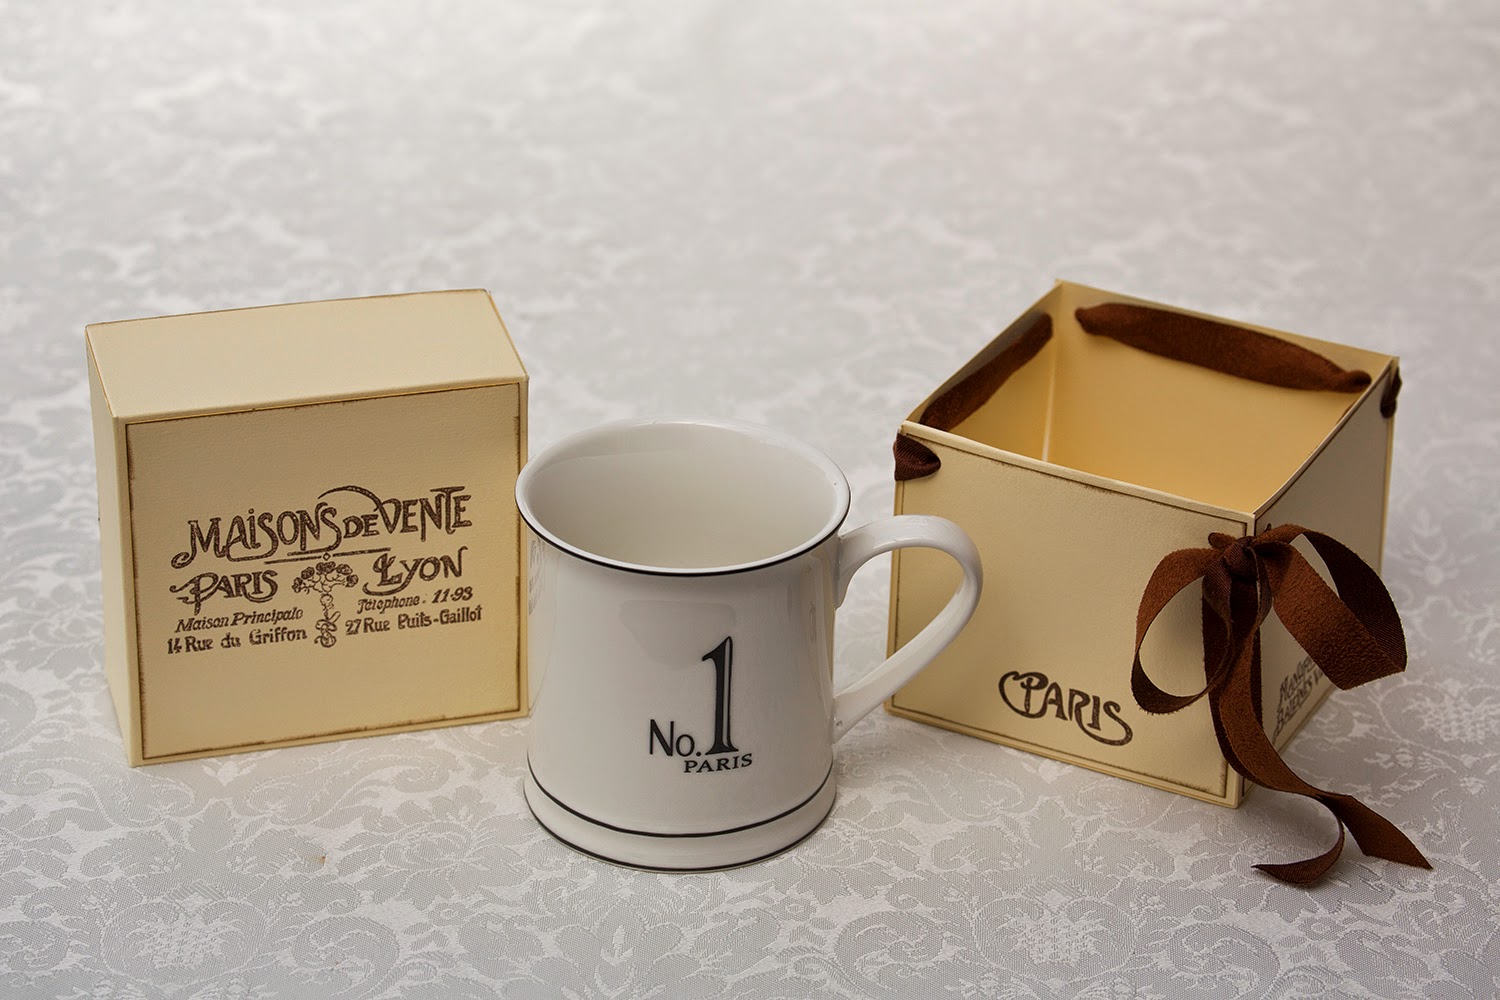
My very good friend had a birthday recently and has a thing about Paris so I got her a lovely china mug but it came without a box so what does a crafty friend do?  Make a box that's what....

Love these stamps from the Oxford Impressions Dress Forms & Corsetry set!  I can see me using them a lot in the future.  Here's the box opened up

And of course her card had to be different too ....

I'm really enjoying making these pop up box cards - great fun and they fold flat for posting which is a bonus. 

Thanks so much for popping over to see me and I hope you've all enjoyed some lovely sunny weather lately.  Margie x


Wednesday, 28 May 2014

J'adore Marie Antoinette

Hello dear friends.  Those of you who visit often will know about my altered book round robin and the latest book to arrive with me was themed Marie Antoinette.  The owner of the book asked for elegant, frilly and over the top so this is what I came up with.  My first page was inspired by a quote said to be the response when a sympathiser told Marie Antoinette to "have courage" on the way to the guillotine.

"Courage!  I have shown it for years.  Think you I shall lose it at the moment when my sufferings are to end?"

The background was made with Fresco chalk paints over a gesso'd surface with some ripped text paper, the main image and texture paste added through stencils.  Some stamping and metallic wax came next and then the key fastened on with some wire.  The pearl embellishment added a bit of bling at the side.

It was sad reading about the young girl married to the future king of France at age 14 especially when I read a little piece about her being credited with the invention of the handkerchief which inspired my second spread.
Click on the image to enlarge the writing so you can read the story.  The book pages at the bottom are a prayer written for her soul at the time of her death.  The beading along the bottom was a piece of upholstery trim which will hang nicely from the bottom of the book.  I liked the way the piece of lace tucked into the side of the dress in this spread - here's a better picture.

and the little crown I made with tiny beads here

Really enjoyed working on these two pages and the book will soon be on its way to Australia.  Thanks so much for popping in to see me.  I do appreciate it.  Margie x


Wednesday, 7 May 2014

Queen Bee

Hello again dear friends.  I'm back with another tag using my favourite Julie Nutting doll stamp.  This time it was for a swap with my craft club friends where we had to make use of a blue and white napkin.  I peeled off the top layer of the napkin and stamped the doll stamp on it with white ink so it would show up easily then I cut the dress out and layered it onto my doll stamped onto the pre-printed tag and coloured with Distress markers.

These Prima tags are so lovely and they are printed on both sides.  Once I'd got the dress wrinkle-free, I added a little flower at the waist and some lovely blue crochet lace at the hem.  The bee and crown stamps were from a sheet of free stamps available with Issue 16 of Creative Stamping. (A gorgeous sheet of stamps if you haven't already seen it)  The dark blue ribbon just finished it off, along with some word strips.

The box I got in return was amazing, decorated with lots of flowers made from the napkin.  Other items in the swap included a napkin-wrapped candle, a coathanger, a pair of pixie shoes as well as cards.  Its amazing how one napkin can spark off so many different ideas! 

Hope your creativity is blooming, like the beautiful flowers in my garden enjoying the warmth and the gentle rain at the minute.  Thanks for popping in to see me.  Margie x

Sunday, 4 May 2014

Springtime in Paris

Hello again - just back with a quick post to share a little album I've made for a friend.  Here's the front cover:

 I love making these little albums and finding loads of images to go with my theme.  I used the Madame Payraud papers for the covers but sad to hear these have been discontinued so I won't be able to replenish my stash.  I'll have to keep watch for them on sale anywhere as they are such lovely muted colours and great designs.  I also used my new TH bow die here on the bouquet of flowers and pearl pins.  Inside, I really went to town with 6 pages - I thought the first and last pictures could be the two of us having a refined afternoon tea and a good old gossip!
The album is tied with some lovely purple seam binding I've had in my stash for ages and just fitted the bill.  Hope she likes my little Parisian themed book.  Thanks so much for coming to see me and I hope you are enjoying some Bank Holiday sunshine.  Margie x

I'm entering this in the Spring is in the Air challenge over at That's Crafty.

Thursday, 1 May 2014

Life is a Journey

Hello friends -  it seems like absolutely ages since I posted anything but I've been really busy with workshops and WI groups and, of course, my altered books round robin.  The latest book I received was entitled Life is a Journey and I decided to do one spread of a place I know very well (Japan) and another which would be just about an inspirational journey with some great quotes.  Here's my first spread

The base layer was made with the wrapping from some tea towels sent by my Japanese DIL's Mum and the images were from a gorgeous Japanese art catalogue.  The flowers came from a set of cards and the old pen nib was on a card of 9 nibs I bought at a recent collectables fair - really like those - and the broad washi tape was again a gift from my DIL, Norie.  The little bow opens and the flap lifts up to reveal some journalling about my trips to Japan to meet Norie's family .  I really enjoyed doing these pages - very soothing.

The second spread is a bit more lively.

I gesso'd the pages before painting on some Fresco Finish then stencilling leaves and dots.  Lots of Tim Holtz clippings from his wonderful papers and some journalling using my beautiful glass pen (again a gift from Japan) that actually makes my writing legible!  The piece of mesh came from hubby (something to do with tiling I think) and the quotes came from all over the place.  There was one more I would have liked to include but couldn't find room for it.  "Never look back!  If Cinderella had gone back for her shoe, she never would have become a Princess!"  Love it!

Just before I go, here's a tag I made with my lovely new Julie Nutting doll stamp.  This is what we'll be making at my next little workshop - I'm sure the girls will have fun with this one. I know I did.


Hope everyone is well and looking forward to another long weekend (if you are in the UK).  Thanks for stopping by - I always appreciate it.  Margie x

Sunday, 30 March 2014

Ancient Egypt Altered Book

Hello there friends, it seems like ages since I last posted but I've been busy working on my spreads for the altered book round robin.  This book was entitled Ancient Egypt and the previous artists had done some amazing work leaving me wondering where to start.  I was so pleased to borrow some stamps from a friend which got me going and it went really well after that.  Here's the first spread

The pages of the book were quite flimsy and shiny so I decided to fold some to make a central pocket for my tag and then decorated both sides.  I used Tim's new Latticework stencil on the left hand side and distressed the paper to look a bit like an old scroll.  The right hand side was painted with Seedless Preserves Distress Stain which allowed the printing to show through and I sealed the edges with some washi tape.  I loved the bit of upholstery trim I found in my stash and frayed the ends, dipping them into glue and gold glitter.  My tag was embossed and then rubbed with several colours of metallic paste and polished to a shine and decorated with a bronze mummy.

Here's the second side of that pocket

This side of the pocket was painted with Broken China Distress Stain, dabbed with gold paint and trimmed with more washi tape and ribbon.  I really liked the idea of a corrugated cardboard pyramid rubbed with gold paint and the sphynx in front.  Someone else before me had used very fine sandpaper for their sand - great idea.  My scarab beetle was actually finished off with a gold coin and some shiny beads but that was last minute after I'd taken these pics.  I had to get it wrapped up to send to Australia in the morning for the next part of its journey.

Thanks for joining me today and if you've never altered a book before, I'd certainly recommend it.  Especially joining in a round robin - its really inspiring to see other people's work.  Hope everyone is having a great Sunday and better weather than we have here in NE England where its been thick fog all day.  Nice and warm by the log fire though.  Margie x

PS  My son sent me a Mother's Day message from Kenya today where he's been taking part in a charity climb of Mt Kenya to help raise funds for a village his firm is supporting.  I'm so proud of him I could burst.

Tuesday, 11 March 2014

And finally, the Steampunk folds......

I know its late but I had to share these photos of my star pupil's amazing Steampunk theme book now she's completed it.  This was Jan's first try at folding books and I think she has really embraced the idea of making a real talking point of her creation.  See what you think.

I love the chain with the watch round the middle and all the items she's managed to attach with wire so that they stand away from the pages.  Here's some of the detail.


And a close-up of her very neat folds


I'm so proud (like a mother hen!) and pleased that they all enjoyed the workshop and will hopefully come back for more crafting fun.  Thanks for popping over - I do appreciate every visit and comment that you leave.  Margie x

Sunday, 9 March 2014

Vintage ladies domino book

Welcome dear friends on an evening when we've had the most glorious sunshine and I've actually been out working in the garden for a change!  Roll on the summer but in the meantime, here's a tiny domino book I've made for my partner in this swap.  It really strained the old eyes but I do like working in miniature.

First of all, here's the book closed up:

I finished off the front with a little frame holding a tiny portrait which I covered with Glossy Accents to look like glass - really pleased with the way that turned out.

This picture shows the lovely vintage ladies inside:
and the next one is the back of those pages:
and the last picture is the tiny box I made for the book with a little window to show the front of the book inside:


This book is now on its way to Canada - hope my partner likes it!  Oh, by the way we have the first lambs in the field behind our house today, so sweet.  Hope you're all enjoying some better weather at last.  Margie x

Entering this into the Inspired by Stamping "Anything but a Card" challenge here.

Saturday, 1 March 2014

Having fun with folded books

What a great time I had today running the second part of my book folding workshop at our local gallery.  Last week, all the books were folded and this Saturday the decorating began.  As you can see here, there was plenty going on (it looks a bit like my table when I'm crafting!)

This is Alan, Jan and Sally looking very intent on their decorating!

Then these are Mary, Katie and another Mary having a fit of the giggles over theirs!  As you can see, its a lovely, light and airy room to work in with a nice fire and we were kept supplied with coffee and cakes too.

Two hours went by very quickly and here are some of the finished books.  The others were taken off to be finished and pictures promised when they are done.

This is Sally's "sewing theme" book.  I love the ribbon at the front and her great choice of embellishments.

This is Alan''s "medical oddities" theme.  My pic is a bit dark but it was a very interesting theme made in an old medical book full of the strangest photographs!

Mary's "Russian travel" theme included a great collection of memorabilia from a recent trip there and was actually created in a book all about Russia.  Love the doll bookmarks!

And this is Katie's "travel" theme book and she did the printing of the old steam train on a book page - it looked great.  I'll let you see the other two when I get the pics but I hope you've enjoyed seeing these.  Amazing how they all turned out so differently.  Hope you are enjoying the weekend and manage to get some time to craft yourselves.  Thanks so much for popping in to see me.  Margie x


Monday, 24 February 2014

Cowboys and Indians!

Hello there dear friends.  I'm here with another couple of spreads made for the altered book round robin I joined and this book was entitled American South West which really had me thinking.  Anyway, when I saw what had already been done and the kind inclusion of some images from the book's owner, I got stuck in - literally.......

Here's the first spread which is for the cowboys:

I really liked that the words on the right hand page had already been provided - that gave me a feel for this spread and I enjoyed adding the textured ferns and the stencilled big stars.  The cactii picture was printed on tissue paper which was mod podged onto the already gesso'd page which I coloured with some Stormy Sky and Bundled Sage DIs.  The bird is probably totally out of place for the desert but I liked it anyway.

The next spread for the indians is my favourite:


I started off with this fabulous picture of a Hopi indian and wanted it to look dark and ghostly so again I printed it off onto tissue paper and then mod podged it onto dark brown paper - I loved the effect but it needed brightening with the gold feathers and stars.  On the left hand page, this very colourful Kachina doll was an eye-catching image and I discovered that the colours they used all had meanings which I included on the page.  

A really interesting book and theme to work on and tomorrow this will be winging its way to Australia and my next book will be with me soon.  I hope its a girly or flowery theme this time!

Thanks for popping in to see me - I love to read any comments you are kind enough to leave for me.  Its been a gorgeous day here in the North East of England and I'm hoping that's a sign that Spring is on its way!

Margie x

Sunday, 16 February 2014

My 50p bargain box - altered, of course!

Hi there my blogging friends and I hope the weather is treating you a bit more kindly.  I went to a Collectables Fair recently and was very pleased to come away with a nice haul of old books, vintage keys, dominoes, boxed games and a battered old round box which was a mere 50p!

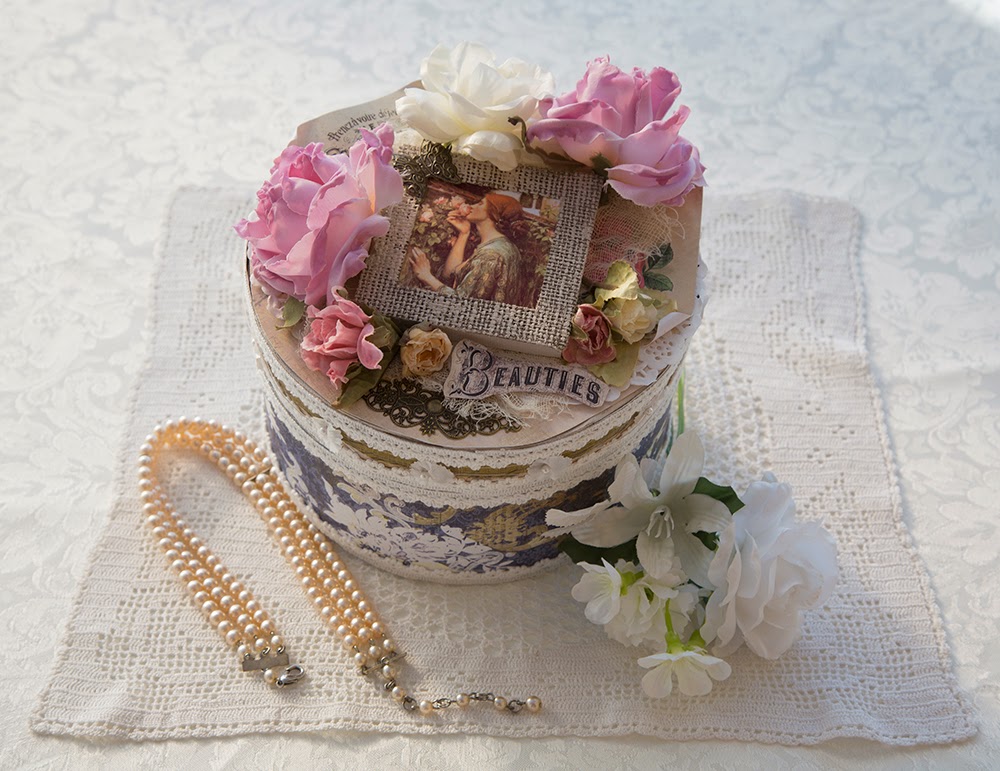
I just wish I'd taken a pic of it before I started but I forgot so you'll just have to imagine the horrible red colour and the peeling paper.  But I knew it had potential and wanted to make a lovely gift box for my friend's 65th birthday present.  So here it is.


 I covered the box with some beautiful K&Co Blue Awning papers (another bargain from ages ago) then decorated the edges with lace and white flower trimming.  The focal image is from a sheet called Waterhouse Flowers from Alpha Stamps digital images - a really lovely sheet.  The frame around it was an old green hessian one which I've dabbed some cream acrylic paint over to lighten it. In this next picture, you can see the labels I've cut from the Madame Payraud papers - fast becoming a favourite of mine and the beautiful silk flowers given to me by a friend who used to do flower arranging. 

Thanks so much for calling to to see me and I love to read any comments you have.  Enjoy the break in the weather while it lasts, I hear the UK is in for more storms next week but our friends over in some parts of the US are having even tougher times.  Margie x

Thank you to Neet for the suggestion - I'm entering this into the Artful Times Challenge Blog here